Setting Up PHP Storm
Layout File: tags.php

Step 1: Saving Your Akeeba Zip File
-
- Using Akeeba Backup and create a new backup profile by adjusting the following settings:
- Basic Configuration > Backup Type > Site Files Only
- Advanced Configuration > Archiver Engine > Zip Format
- Save & Close
- After running the new backup profile we just created:
- Download the zip file to your computer
- Save it to a folder named whatever your project is (I will call it 'My Template' for this exercise)
- Unzip the contents of the download into the new folder 'My Template'
- Using Akeeba Backup and create a new backup profile by adjusting the following settings:
Step 2: Setting Up PHP Storm
Now that we have created a directory on our computer with all the website files from our Joomla project, we will connect PHP Storm to our website using FTP. There are far more features and benefits found in this program than what we will cover (which will be the essential items needed to get started).
-
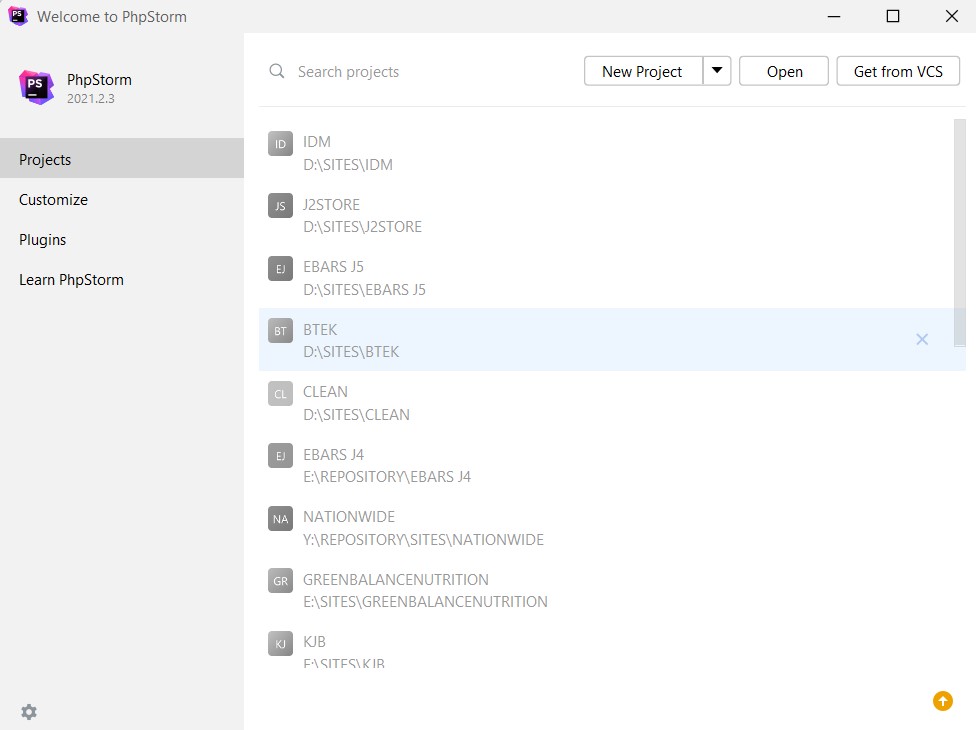
- When you first open PHP Storm, click on the 'New Project' button in the upper right corner shown in the image below:
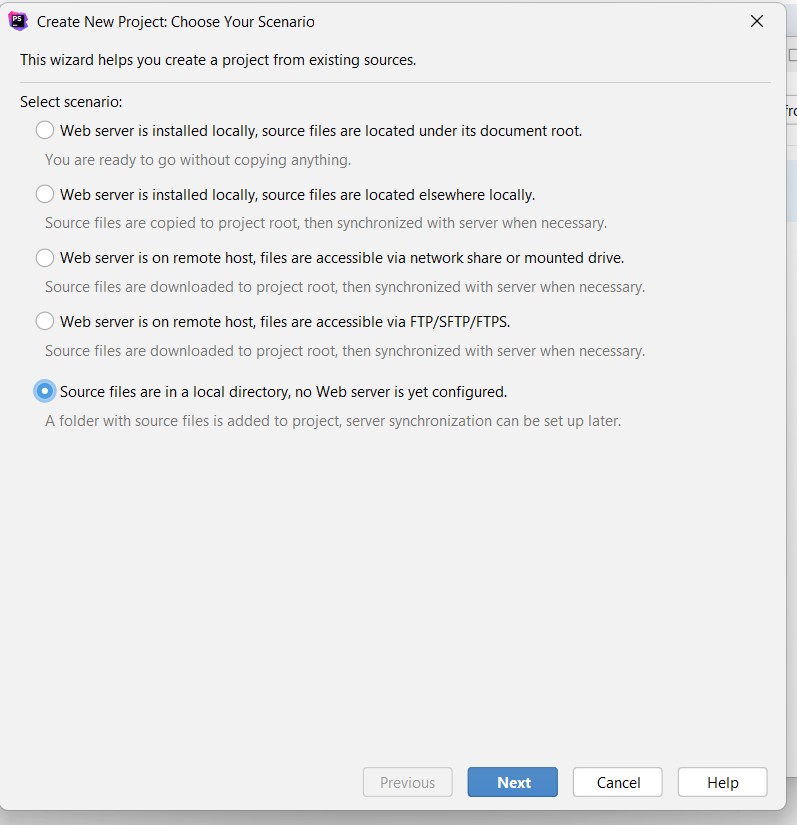
- In the next step select the last item shown below:
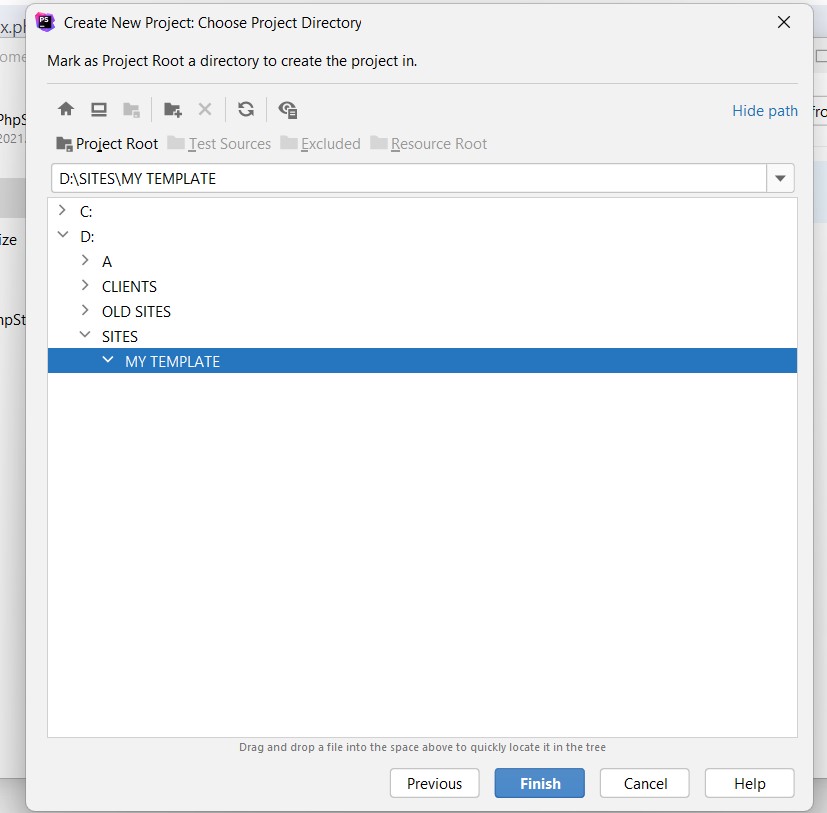
- Select the folder you named in Step 1 ('My Template') and click the blue 'Finish' button at the bottom:
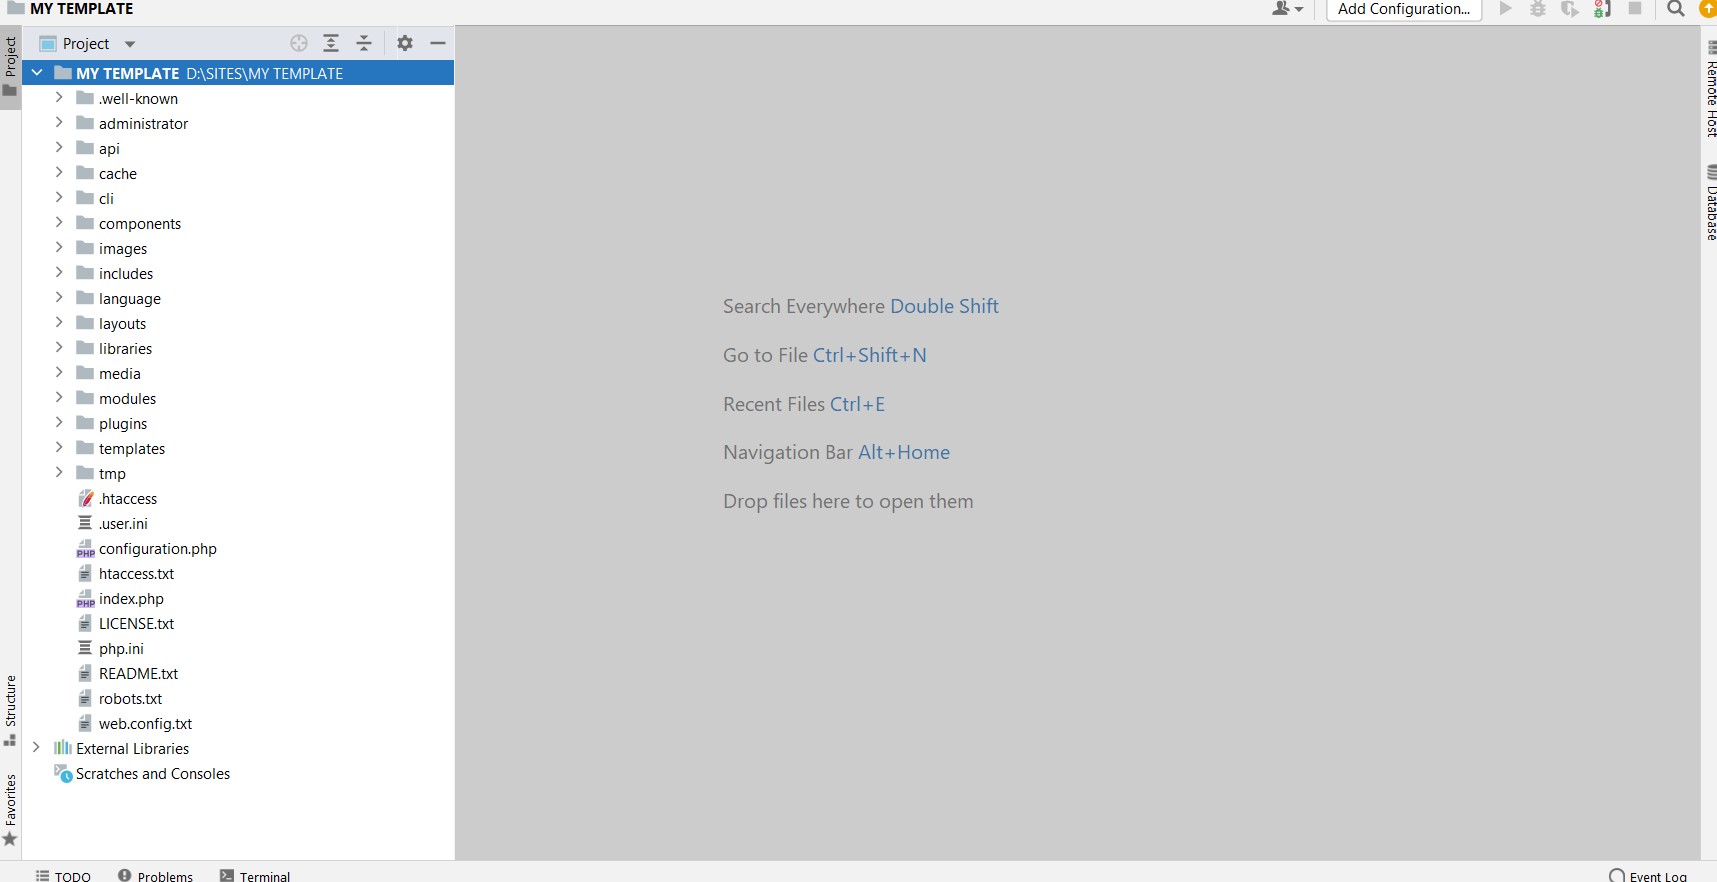
- If your PHP screen looks similar to the image below, you are on the right track!
- Next, we will select Tools > Deployment > Configuration to add our FTP credentials.
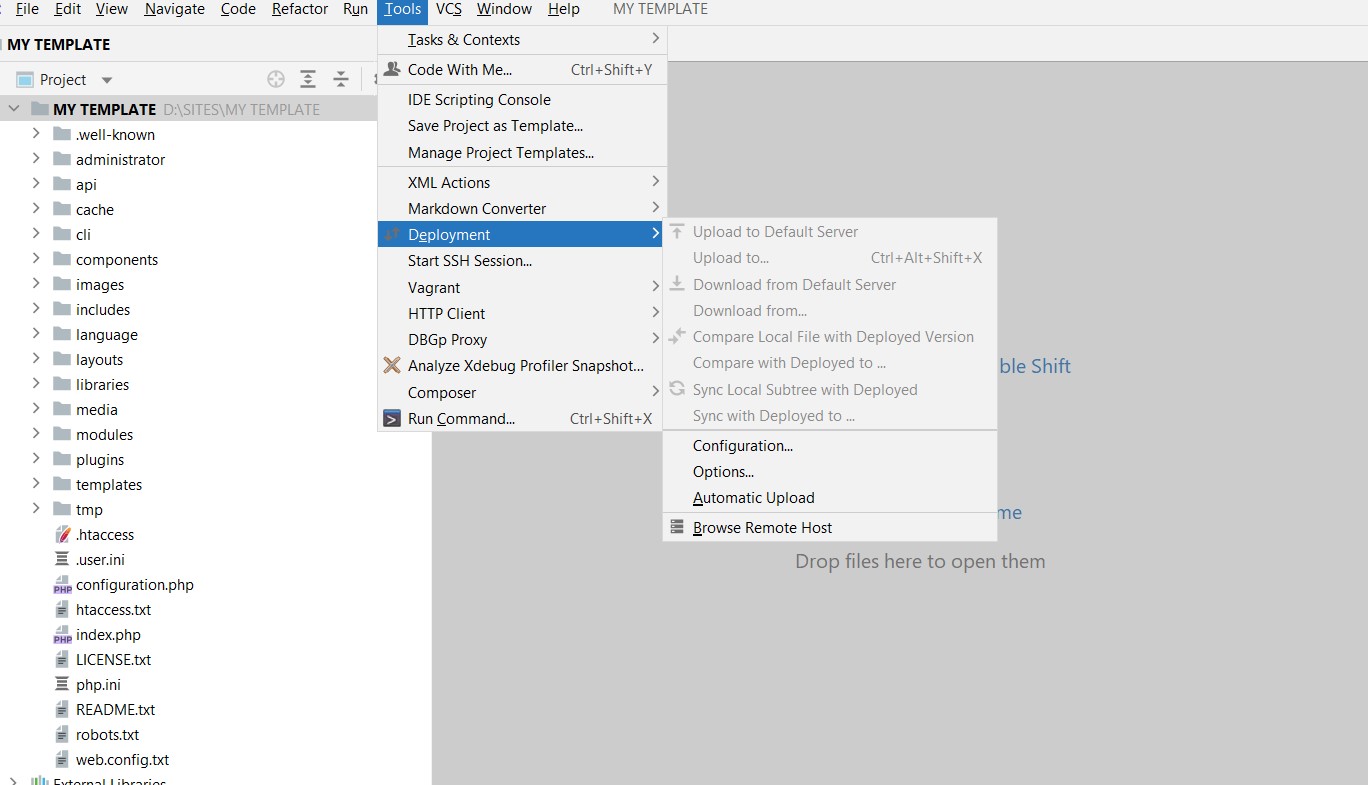
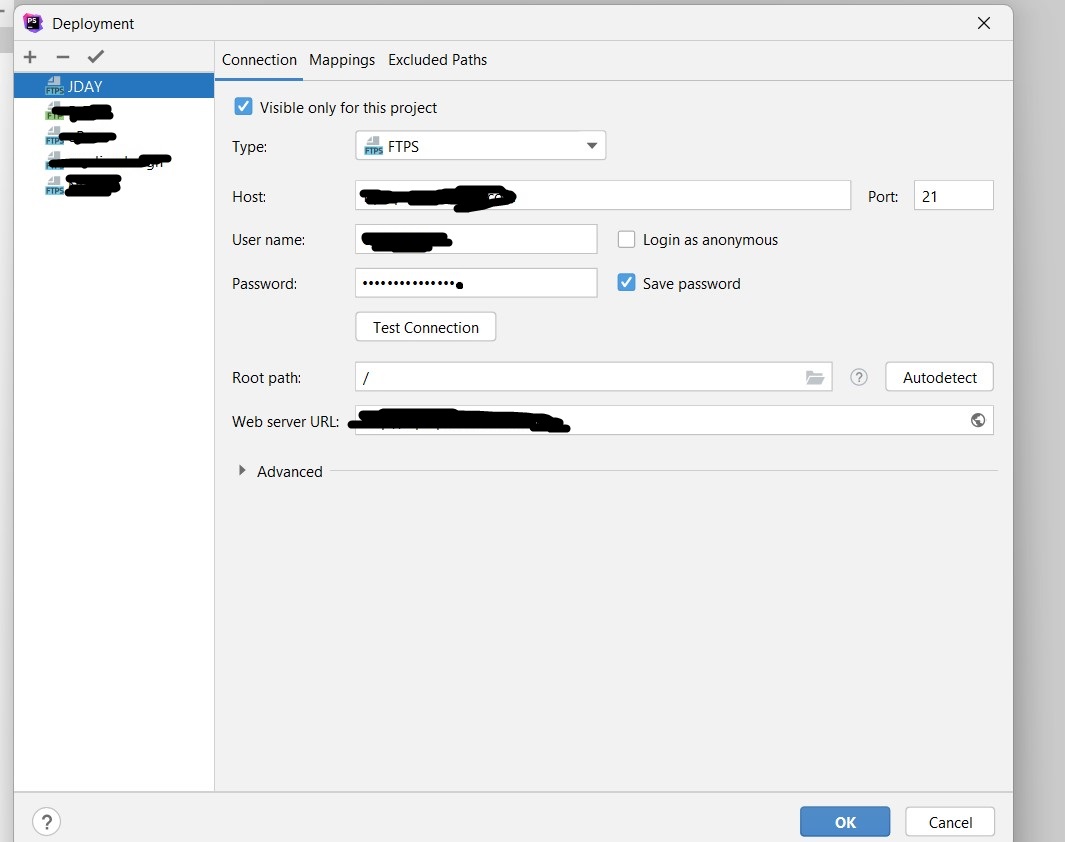
- Next we will map our new folder 'My Template' to the deployment path (website's directory). Select the website directory in the deployment path field:
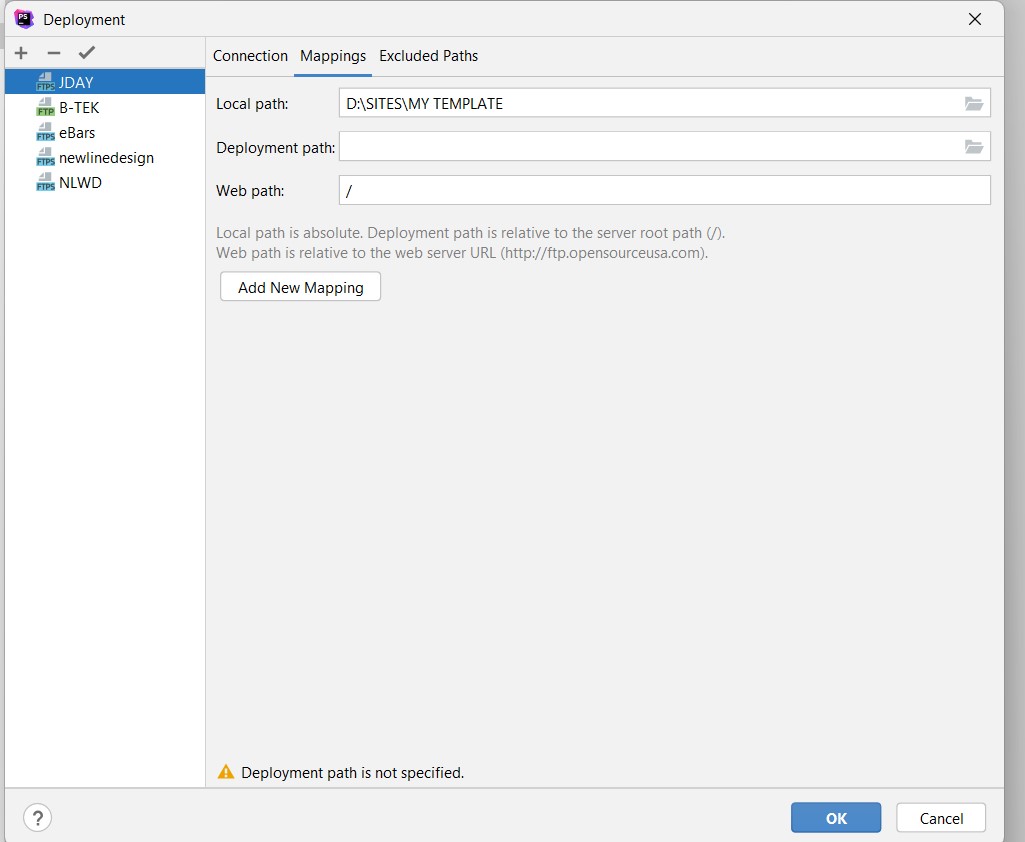
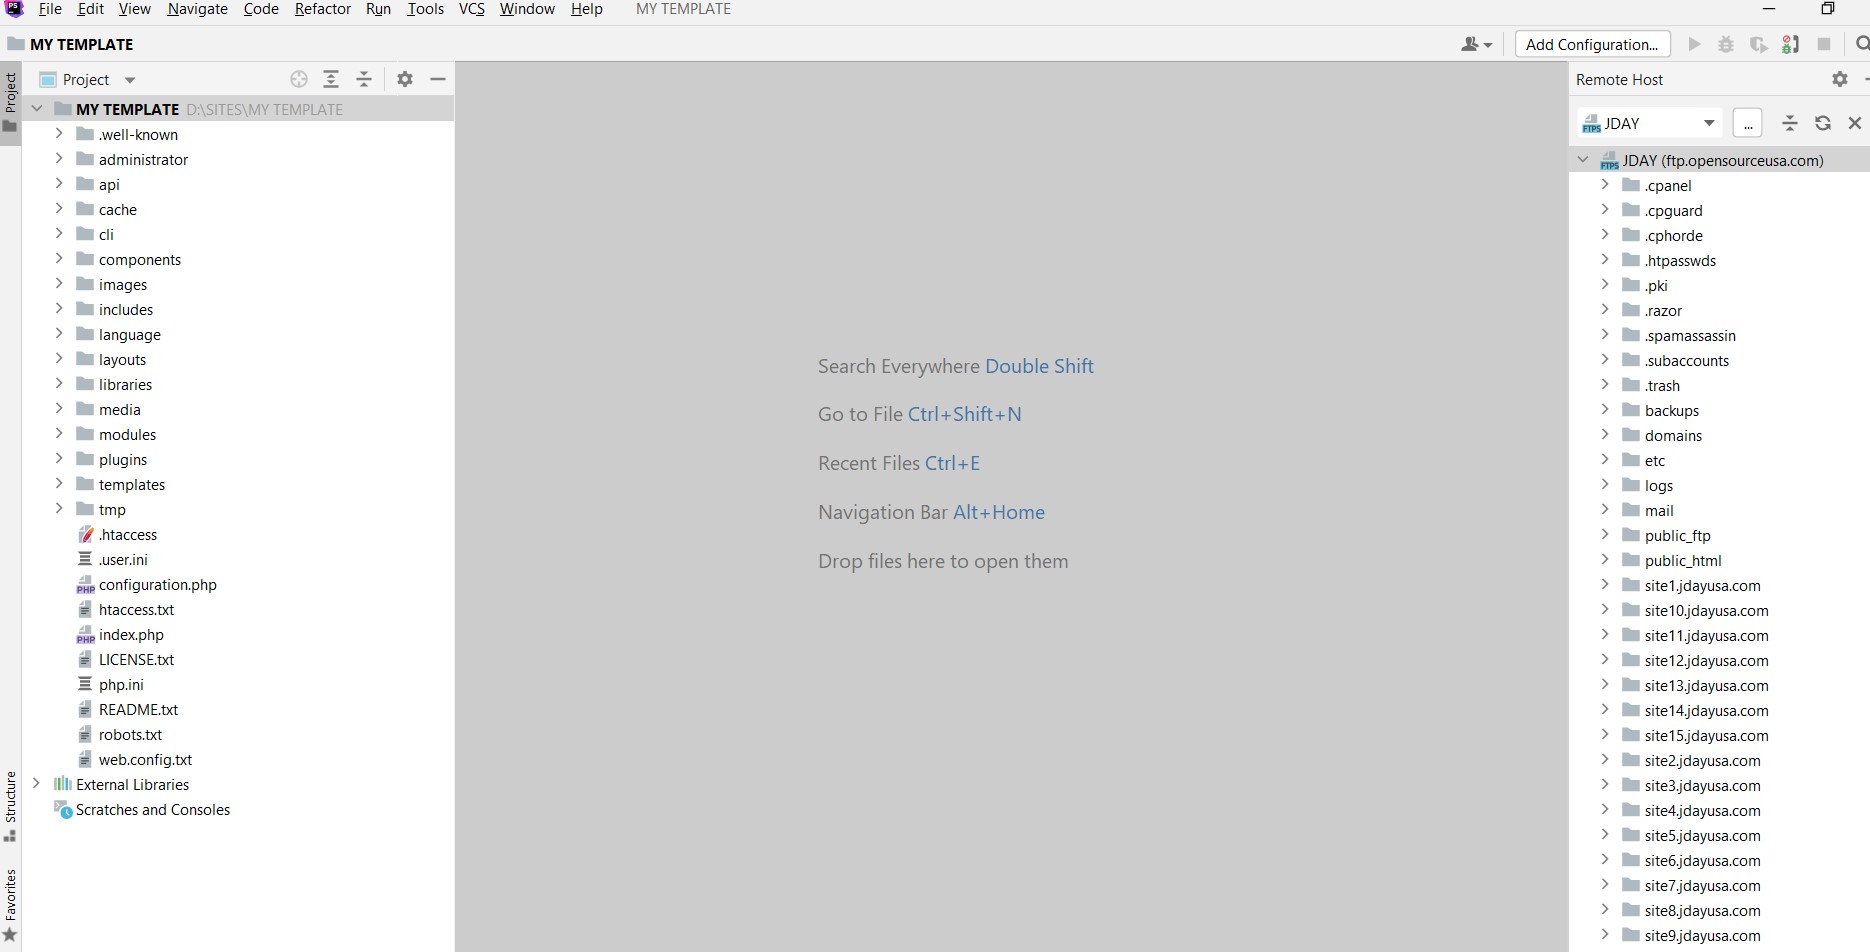
- If you have followed the steps above, your PHP Storm screen should look similar to the image below. As an additional tip, by selecting 'Automatic Upload' under Tools > Deployment your files will automatically upload to your website when you save them on your local computer.
- When you first open PHP Storm, click on the 'New Project' button in the upper right corner shown in the image below: